
Give us a call today: 416 663 4777 for a free upfront estimate!
The pipes behind the walls of your home are part of the infrastructure. As they start to age, they can wind up costing a fortune in property damage. The answer is pipe relining. Dr. Pipe Drain and Plumbing can provide professional sewer pipe relining services to protect your home in the GTA.
Sewer line repair isn’t the type of service any Toronto homeowner anticipates. However, pipe lining means the process is not invasive since heavy excavation isn’t needed. Pipe lining involves drilling one or two small holes — not digging up your entire yard and ruining your landscaping. That’s why pipe lining is the best option for sewer line repair.
At Dr. Pipe Drain and Plumbing, our licensed plumbing professionals have up-to-date training on trenchless pipe bursting processes and procedures. Give us a call or reach out to us courtesy of our contact form or WhatsApp. You’ll get a free quote for your home’s sewer pipe lining and relining service.
Contact us for a thorough drain cleaning for stubborn clogs that persist despite your best efforts.
Signs that Your Residence Requires Sewer Pipe Lining
Here is a list of some of the common signs you need to call a licensed plumber for sewer pipe relining or sewer pipe lining service at your home in the GTA:
- Minimal or inconsistent toilet water levels
- Bad odors coming from your kitchen sink or bathroom drains
- A soggy, muddy, or flooded front or backyard
- Slow-draining water from one or more drains in your residence
- Odd sounds coming from your pipes
- Climbing water bills
- Sewage backups
If you see any of these signs, don’t ignore them. They could be telltale signs that you need pipe lining in Toronto or pipe relining in Toronto. You need to contact a licensed plumbing professional like Dr. Pipe Drain and Plumbing for help.
We offer GTA homeowners emergency sewer services 24/7. This means that we will dispatch a crew of professional plumbers to your home to figure out and fix your sewer line.
Call us at Dr. Pipe Drain and Plumbing for a free quote for sewer pipe lining or relining service. We’ll find the problem using our sewer camera inspection and fix the issue.
Your Best Choice to Fix Broken Pipes Includes the Pipe Lining Method
Dr. Pipe knows two of different methods to fix your broken pipes: cured-in-place lining or excavating.
If you’re searching for “pipe lining contractors near me,” Dr. Pipe is here for you. Let’s examine pipe lining vs no pipe lining.
1. Sewer Pipe Excavation
Damaged pipes repair can be accomplished by excavating the area to replace pipes and connecting a new section in the sewer line.
2. Pipe Lining Sewer Line Replacement
Cured-in-place piping (CIPP lining) has become the preferred method to fix existing pipes around existing homes for sewer lines or pipe lining for water line replacement.
Underground pipe lining uses specialized cameras and a hot air compressor. Unlike excavation, trenchless pipe lining allows “hardscape,” landscaping, and property walls to remain intact and leaves no mess behind.
An Explanation of the Pipe Lining Process
The relining process has two different piping install solutions, one of which is the Pull-in-Pipe (P.I.P) method, which is, in turn, much like the inversion process. Essentially, Pull-in-Pipe solutions and the inversion process have similar steps involved in the process of completion.
The Pipe Lining Process of Trenchless Pipe Repair
Trenchless technology has become an affordable, long-term solution for many home and property owners, and Dr. Pipe has expert knowledge in trenchless sewer repair and water line repair.
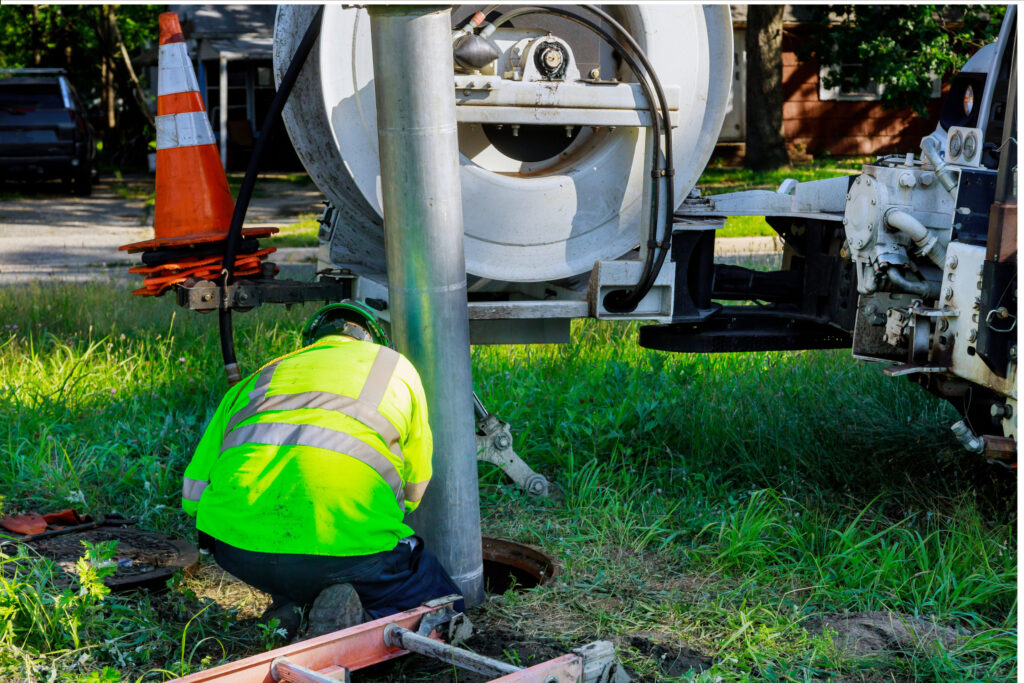
Step 1: Inspection of Host Pipe and Pipe System
A licensed plumber from Dr. Pipe will inspect your drain pipe system for any issues, including debris or damage from tree roots, using a specialized CCTV camera as our inspection tool.
This efficient process allows Dr. Pipe to quickly discover the problems, especially with older cast iron pipes. After we’ve snaked the drain with a professional drain snake, our experienced plumbers flush your pipe system with water to make sure it’s free of all debris.
Step 2: Using Epoxy Resin in Bladder Installation
This step is crucial and involves specific tools and equipment Dr. Pipe’s licensed plumbers use.
We install a bladder into a flexible tube created from laminated felt to carry an epoxy resin. The polyurethane membrane bladder is specially created to withstand pressure of up to 30 PSI.
Step 3: Time to Mix the Epoxy Pipe Lining
Our recommended pipe lining method involves mixing epoxy to harden the drain liner used in trenchless pipe lining.
Dr. Pipe always uses a two-part epoxy for long-term durability and the strongest pipe lining, and our precise recipe of epoxy resin and hardener is always measured by the length of drain pipe liner required for your pipe lining, water line replacement, or sewer line replacement.
This process requires professional expertise mixing the epoxy to guarantee the best results. Dr. Pipe ensures the epoxy gets mixed correctly, then saturates the pipe lining using a professional vacuum suction at one end and a pushing roller at the other.
Step 4: Installing Drain Pipe Lining
Underground pipe lining using the trenchless pipe lining repair method requires one small excavating hole to access pipes safely, including cast iron or older clay pipes. Dr. Pipe uses professional pushing rods to insert the liner and bladder assembly through the small hole.
Our specialized pushing rods can reach as far down as 30 feet. After installing the liner assembly, we inflate it to around 12 PSI for three to four hours.
This bladder assembly allows the liner to cure completely. After Dr. Pipe is confident that the new pipe system is cured, we extract the bladder to leave behind a new water or sewer pipe.
Step 5: Dr. Pipe Conducts a Final Inspection of the Drain Pipe Lining
Dr. Pipe doesn’t simply wait for a new drain liner to cure. We ensure the quality of your new trenchless pipe lining system with a final inspection using our specialized CCTV camera.
When you’re searching for “pipe lining contractors near me,” remember all these steps, or better, call us to guarantee a plumbing job done right the first time!
Causes of a Sewer Backup
Property owners, as well as managers, know all too well the havoc and problems that rainwater leader pipe work and sewer drainage pipes can cause. Both rainwater leaders and sewers develop troublesome leaks that can cause a backup. The presence of a backup is because of one or more causes, including:
- calcification
- pipe work age
- intrusive tree roots
- movement of the ground.
Property owners are dealing with costly damages, in fact, the costs can reach millions each year, all because of crumbling and decaying municipalities’ infrastructures underground.
Health Risks of a Sewer Backup
The damage leaking sewage creates is not limited to outdoors and the destruction of property, but it brings health risks with it as well. It can end up contaminating any area it encounters, particularly with harmful bacteria and molds. When a sewer backs up it can force contaminated wastes into the nearby beaches, waterways, and streets.
Thankfully, a solution like Trenchless technology exists that offers an alternative to the traditional type of costly pipe replacement. Trenchless technology can help in repairing rainwater leader pipes and sewer drainpipes.
The specific technology is Cured-in-Place Pipe or CIPP for short. The latter technology allows a professional to form a pipe inside an existing, damaged pipe.
The CIPP has a unique epoxy resin that helps in creating new pipes and there is no need to damage landscaping, streets, sidewalks, interior walls, floors, or building structures to install this highly innovative technology. The CIPP process of installation has proven successful for two and a half decades now. The two methods of installation are the pull-in-place, or PIP for short, and the inversion method.
P.I.P – The Pull-In-Place Method
The pull-in-place method of pipe repair is the following:
- Two holes or access points need to be created, one at each end of the pipe.The access points will allow a professional to feed the cure in pipe through the existing pipe underground without any further damage to the landscaping on the surface. One hole allows the line to be feed and the other allows it to be pulled into position. At times, however, only one access is created – this requires the inversion process of installation.
- An epoxy-saturated liner is pulled into the correct position inside the existing pipe. The pipe is cured in place and the new pipe is flawless, allowing for the flow of water and waste once more.
Professionals who have used the pull-in-place process successfully for so long now, no doubt, millions of linear feet of new, sturdy drain lines have been installed without issue. Please note that every repair situation is unique and every project and building requires a full assessment to determine the best pipe repair solution. A professional installer can discuss the trenchless technology solutions available to you and provide you with the technical expertise to address your needs, no matter how corrosive the environment or how damaged the pipe work.
Pipe Relining Solutions
Dr. Pipe Drain and Plumbing Services are the experts you can call when you want to know more about trenchless pipe lining technologies. The company remains current with all the newest advancements and innovations in the field of pipe relining as we make every effort to provide you with the latest solutions for pipe repair and the best in customer service. We have the ability to discover pipe work problems without disruption of the landscape and without having to dig.
In fact, not only do we have the ability to quickly assess pipes and determine if there is an existing problem, we can use innovations like robotic cutting and water jetting as potential solutions and repair implementations. We even have means to help prevent bigger problems down the line.
Give us a call today: 416 663 4777 for a free upfront estimate!